Thursday, January 19, 2012

Dare to Dream

This card came about mostly because I sat down with a goal of using Harvest Berries. It's one of those sets (ok, there are probably several others, lol) that I loved when I saw it, I bought it because I had to have it, and I love so many projects that I see with it. But, it just doesn't get used as much as it should! I also wanted to try my new Raspberry Fizz ink and paper, so here it what I ended up with:


I used Aqua Mist paper and stamped Harvest Berries with Hawaiian Shore and then stamped Text Style 2 with Versamark. I added some berries with Raspberry Fizz. For the sentiment focal point, I stamped Harvest Berries again with Aqua Mist, but stamped off first so that it would just be a very subtle silhouette background. The sentiment, from Daydreamer, is then stamped on top with Raspberry Fizz. I used Limitedless Layers circle and scalloped circle dies, and cut and stamped a little stem from Harvest Berries again to stick up from under the focal point. And I did my best to tie a bow with Hawaiian Shores ribbon, but that is definitely NOT my strong suit! LOL!


Some inking, some stitching, and some foam adhesive for a little bit "pop", plus the 3 little gemstones colored with Copics to match, and voila!


Thanks for looking!

Monday, January 16, 2012

Make it Monday: Ghost Masking

Having the day off means that I already got to try out the new Make It Monday challenge for this week: Ghost Masking! When I saw Betsy Veldman's sample card, I couldn't wait to watch the video and see how she got that cool effect. Now, when I sat down to try it myself and thought about what stamps I was in the mood to play with, I decided to do a little bit of a variation on the technique - sort of a riff on Betsy's method, if you will. :) So here is my card:

I used the Mat Stack 1 Collection for the frame. However, since this isn't a full bleed stamp, rather than die-cut for the mask, I used my trusty craft knife to carefully cut, after stamping on vellum, right around the thicker line. Then I stamped Year of Flowers: Sweet Peas, with the inside mask in place. I switched to the outside "negative space" mask and stamped again, stamping off first as in Betsy's video. Now, since this isn't a solid stamp like Betsy used, I got out my Copics and set to work. :) In keeping with the "ghosting" technique, I colored the flowers outside the frame with darker Copics from the Raspberry Fizz range, and greens for the leaves. I used lighter Copics for the flowers and leaves inside the frame, and then got out some very light blues (B0000 and B00) to fill in the white space inside the frame - I like the "glass like" effect that it adds.


The "hello friend" sentiment is from Little Labels... and I can't begin to say how terrifying it was to stamp it, lol! After spending an hour or two with the Copic coloring, it was very scary to know that if I messed up that sentiment, the whole thing was basically garbage - but it came out ok! :)

I rounded the corners and embossed with the Canvas impression plate, then cut the Raspberry Fizz panel and embossed it with the Sunshine impression plate. Added the ribbon and button, and popped up both panels with dimensional adhesive on a white base.

I'm very happy with how this turned out - thanks Betsy for teaching a lovely new technique! And thanks to you for stopping by and peeking at my blog!

Tuesday, January 10, 2012

Make it Monday: Background from Border Dies

This week's Make it Monday challenge is to use border dies to create a background. I decided to pull out my XL Rickrack die and create a multi-colored background by layering the die-cuts like "stripes".

My color palette is Canyon Clay, Summer Sunrise, Spring Moss and Spring Rain. I cut several pieces in each color and then adhered them to a white base, but making sure that the rickrack extended on both the top and bottom. Then I trimmed the edges of the whole panel, stamped it with Polka Dot Basics 2 in Versamark, wrapped a Summer Sunrise ribbon around it and adhered it to my kraft card base. The focal point uses Mat Stack 4 (also stamped in Versamark), a Doily Details die and a Limitless Layer circle, stamped with the border from Tag Its #10. The Happy Birthday sentiment is from Little Labels, and I finished things off with a twine-tied Tiny Tag. The Mat Stack is popped up on foam adhesive, and the doily is popped up on the Mat Stack.


Thanks for looking!

Monday, January 9, 2012

Happy Birthday to my sweet boy!

Eleven years ago today, I got the best promotion ever - to the position of "Mommy"! Ryan has been under the weather since last week with the bad cough & cold that has worked it's way through our house, so we had to reschedule his birthday sleepover that he was looking forward to on Saturday, but I reminded him how nice it will be to have another birthday celebration to look forward to! :)

Here is his birthday card, using Enjoy the Ride. I "borrowed" an idea from a brilliant card by Erin Lincoln to add that cute little doggie driver from Tiny Treats: Valentines! I definitely plan to use that again. I colored the card and dog with Copics, and used a Mat Stack 4 and MS4 Layerz in Lemon Tart and Spring Rain, and then put them on a Canyon Clay panel that was impressed with the By The Numbers plate. The car is popped up with foam adhesive.

The bottom part of the front panel is stamped with BB: Circles. I added the Tiny Tag, twine and button, and the sentiment, also from Enjoy the Ride, on a banner. After I took these photos, I added some diamond glaze to the headlights - a subtle but nice effect.


And here is the birthday boy this morning! He's feeling lousy still, but managed to humor me with a smile for the picture. The lighting was terrible though and the flash didn't help, lol.


Thanks for looking!

Thursday, January 5, 2012

Make it Monday: Catch Up Time!

What a great idea... for the first Make it Monday challenge of the new year, Nichole Heady linked up all 46 MIM challenges that she has posted over the past year, so that you can choose any challenges that you might have missed the first time around. So is it lame that I picked the very last challenge, #46: Folded Tag from Any Die? LOL... I tried to complete #46 the week it was posted, even started it, but the week got away from me and I never finished it. Since Ryan's 11th birthday is next week, I decided to make a fun little folded tag for a birthday gift.


I used Mat Stack 5 as the die to create the folded tag in white, and then cut it again in Aqua Mist for the base of my tag. I cut Mat Stack 2 Layerz in Canyon Clay, and a Limitless Layer in Hawaiian Shores. I stamped with BB: Circles, and used Modern Basics to add a little pizazz to the tips of the MS2. I really wanted to use one of the images in the cute new Tremendous Treats: Valentine, but I masked off the little heart since it is a birthday tag... and let's face it, I'm pushing the boundaries of allowable cuteness for an 11 year old, as it is! ;) LOL! I colored the sweet little dino with Copics and added the "celebrate" from Tag-Its 4 and finished off the front with a button and bakers twine.


On the inside, I wanted to mimic the cute "dino-mite" sentiment from the original Tiny Treats: Valentine, so I used a carefully masked-up sentiment from Make a Wish for the "hope your birthday is", and spelled out "dino-mite" with Fresh Alphabet.


I hope my big boy likes it! Thanks for looking! :)

Friday, December 30, 2011

Christmas Gift Certificate Envelopes

I'm trying to sort of wrap up blogging some of my Christmas projects, so I have two Gift Certificate envelopes to share today. For the first one, I needed to give a rather unattractive certificate that I printed from email, so I wanted to make a nice fancy envelope for it. I created a custom envelope from white cardstock, and then decorated both the front and back. I used Tremendous Treats: Christmas, Winterberry die-cuts, and a Tiny Tag. Here is the front: 


On the back, I added a Doily Details die-cut and a tag that I stamped with an image from Winterberry, after masking the lower part to add the sentiment from Tiny Tags: Christmas. The tag is only adhered to the top part of the envelope, and then I attached a glue dot to the bottom portion, after pressing it against my hand several times to reduce the stickiness. Hopefully the recipients are able to open the flap without too much effort! :)


The other envelope I made was for the boys! For Christmas, we hooked their Wii up to wifi - something they have requested in the past - and also gave them a Wii Points card so that they could download some games. I made a "certificate" up to tell them that the Wii was now online, and attached the Wii Points card to it. This is the envelope I made I hold it, using Tremendous Treats: Christmas, Background Basics: Christmas, a Tiny Tag, and some Spellbinders and PTI dies.


I want to share the back also, as I really like how it worked out. I wanted to just tuck the top flap down into a slit, so before I adhered the envelope together, I put it through my Big Shot machine with a Spellbinders die, just going in enough to cut the decorative slit on the lower flap. Then I reversed to crank it back out. I really like how it turned out!


As always, thanks for looking! And have a safe and happy New Year!

Sunday, December 25, 2011

Merry Christmas - and some Christmas cards!

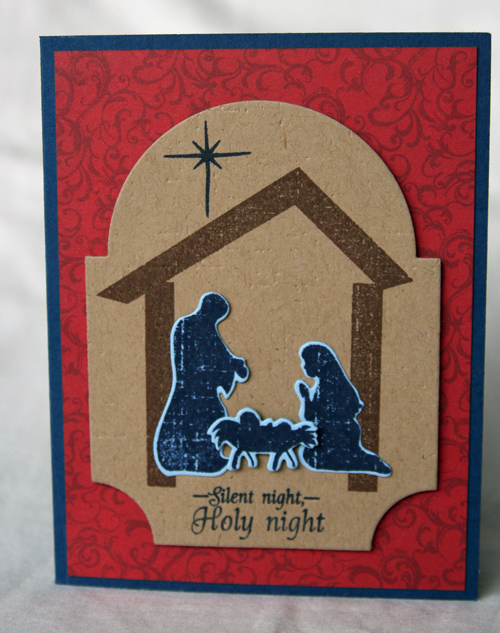
Merry Christmas! Just a quickie drive-by post to share a few more Christmas cards. These first two are very similar, but a changed out the sentiment and a couple of details for some variety. I just love how they turned out. Nativity Silhouettes is definitely a Christmas favorite! :)


And finally, a card using Winterberry, sentiment from Stylish Sentiments: Holiday, and a some Background Basics: Christmas peeking through the Quatrafoil die cut on the lower half of the card. I also used Waltzingmouse Stamps Very Vintage Labels 18.


Thanks for looking! Off to check on the ham! :)

Friday, December 23, 2011

Christmas Tags

Merry-almost-Christmas-Eve!! Since I've been doing a lot of wrapping in the past couple of days, I thought I'd share some of the tags that I made this year. Tags are so fun, since you can do several in a short time "assembly-line" style, and build up a nice stash to have on hand. I used to hide gift tags on the back of the packages, but now that I make my own, I put them right on the front where they can be part of the package decor! :)

I recently got my first couple of Waltzingmouse sets: Labels 18 and Labels 4. LOVE THEM! I can't wait to get some more WMS sets... I already have a few picked out! So I used a few of the frames in those two sets, along with a lot of PTI, of course: Tremendous Treats: Christmas; Tiny Treats: Christmas; and Winterberry. Also used PTI and Spellbinders dies. 


Thanks for looking!

Wednesday, December 21, 2011

a couple of Christmas cards!

Wow, my poor blog has been so neglected! I have been taking photos of the Christmas cards I've been making but just haven't stopped to blog them. So I'll try to share some cards and tags over the next few days.

Two cards to share today! This first one is a very simple card with Nativity Silhouettes. I just love this set. I used the new Mega Mat Stack 3 for the focal point, and popped it up on the patterned paper.


The other card I have to share today used Star of Wonder and the Mat Stack 1 Layerz die. The patterned paper is Echo Park, and the decorative die is from the Spellbinders Fleur De Lis accents set.


I'm going to share a few other cards over the next few days (now that they are in the mail, lol!)... I hope you'll come back to see!

Thanks for visiting and have a very Merry Christmas!

Saturday, November 26, 2011

Another Make It Monday: Background from Sentiment Stamps

I managed to get another card finished for the current Make It Monday challenge! I used a combination of images and sentiments from Nativity Silhouettes and Star of Wonder. I just love how these two sets coordinate so beautifully together! The card base and the rectangular panel are Soft Stone, and I sponge-inked the edges of the panel with light blue and then a darker blue just on the edge. I stamped the sentiment a few times, stamping off each time first.  


I stamped the sunburst in dark blue on the panel and on the Spring Rain half-and-half strip, both times stamping off lightly first. I also stamped it using versamark ink on Spring Rain cardstock, and then stamped the circular image in dark blue on top, and punched it out. I lined up the panel, the strip and the circle so that the sunburst images were lined up, with the circle popped up on dimensional adhesive.


I matted the panel on Enchanted Evening, added the scalloped patterned paper strip (Echo Park), and some gems.

Thanks for looking!

Wednesday, November 23, 2011

Make it Monday: Backgrounds with Sentiment Stamps

I was so tickled with myself to get a card made for this week's Make It Monday challenge ON MONDAY... but then, it took me until now to actually get the photo uploaded and blog it, so I guess no gold star for me after all. LOL! But I do really love this challenge - did you see Betsy's card?? Oh my goodness, it's gorgeous! I decided to go with my Winterberry stamp set, which I got last month, but just got the dies for it when they came out this month. I layered the background with both images and sentiments from the set, stamping off lightly first to get a subtle image. I also stamped a few of the small sprigs, and the berry cluster from Harvest Berries, without stamping off first. I think the variation in the "boldness" of the stamping adds a lot of wonderful depth.


I popped up the die-cut tree, colored with Copics, and added a sweet Little Bitty Bird and a Tiny Tag 2. The patterned paper background is from Echo Park, and the Mega Mat Stack 1 is on Fine Linen, with the tree, bird and tag all cut from Vintage Cream, and a Vintage Cream card base.


Both the tree + bird, and the mat stack, are popped up on dimensional adhesive.


Thanks for looking! :)

Sunday, November 6, 2011

Another Make it Monday - Background Building

Just a quickie post to share another card I finished for this week's Make it Monday challenge - background building. I wanted to use my new Winterberry set, and I thought using the hanging ornaments in the set would add some nice punches of color!


The ornaments, leaves, and berries are colored with Copics. I also added the little 3-dot berry grouping from Harvest Berries to fill in some of the white space and balance the design a bit. I used the Holly Jolly die to cut the leaves from felt for the raised sentiment panel, and added some little gems for a touch of sparkle.

Thanks for looking! :)

Tuesday, November 1, 2011

Make it Monday: Multi-stamp Background Building

Wow, my poor neglected blog! October was a really busy month! But I am so happy that today I managed to find a little bit of crafty time, and completed a card for Nichole Heady's latest Make It Monday challenge, which is to build a background pattern using multiple stamps. Seeing as how it's November 1st and I have not yet used my new Autumn Acorns set, I thought that a pretty fall-leaf background was a perfect plan. I combined the leaves (stamped in Orange Zest, Summer Sunrise and Terracotta Tile, and berries from Harvest Berries in Pure Poppy) with a small image from Turning a New Leaf (stamped in Spring Moss), a sentiment from Tag-Its #7, and a Little Label.


I die-cut and stamped the double leaf and adhered it with the sentiment on a Dark Chocolate fillable frame #1 die-cut, popped it up on the background and added some twine and a Dark Chocolate button to finish it off.


Thanks for another great challenge, PTI, and thanks for looking!

Monday, October 3, 2011

Another Make it Monday - thick chipboard accent

Super quick post because... ack... I just realized that I never posted this card I did last week, for the Make It Monday challenge! My thick chipboard accent is that sweet little Fly Away plane. Thanks for looking! :)


Friday, September 30, 2011

Make It Monday: layered chipboard accent

A fun Make It Monday challenge this week: create a thick chipboard accent by layering several die-cuts of thin chipboard (which the thin dies can cut!). I just got some new Echo Park 6x6 pads, including the lovely Victoria Garden. I combined that with a piece of the new PTI Candy Cane Prints paper, which I cut at an angle so that the diagonal stripes would be vertical.
My thick chipboard element is the Turning a New Leaf accent, with a top layer of Simply Chartreuse, stamped with versamark ink. I also used the Layerz Mat Stack 2 die, the Limitless Layers collection, Tag-its 3, and a sentiment from Take 3 Summer, to complete the focal point.  


The focal point panel is layered over the thick chipboard stem, and then popped up on dimensional foam adhesive.


Thanks for looking!